- Create a New Page:
- Go to your WordPress dashboard and navigate to Pages > Add New.
- Give your page a title like “404 Page Not Found” and design it using the Elementor Free plugin.
- Note the Page Slug:
- After publishing your page, note down the page slug. For example, it might be something like
/page-not-found.
- After publishing your page, note down the page slug. For example, it might be something like
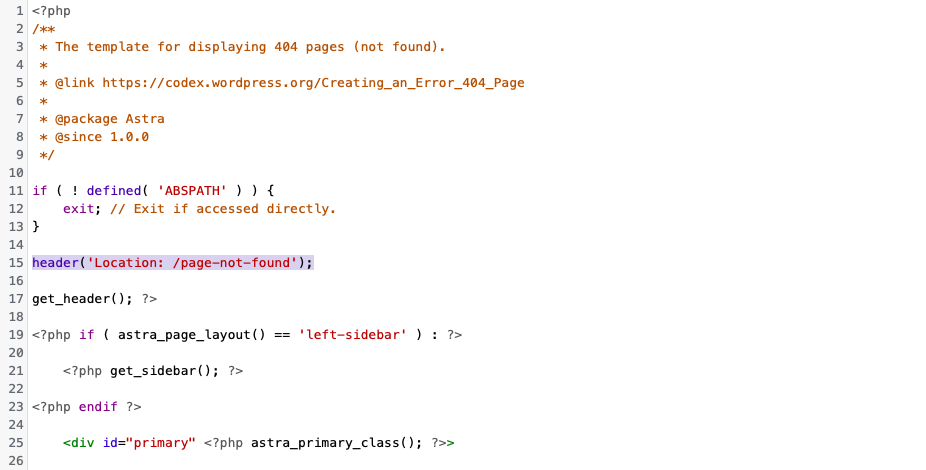
- Edit the 404.php File:
- In your WordPress dashboard, go to Appearance > Theme Editor.
- Locate and click on 404.php in the list of theme files on the right-hand side.
- Add Redirect Code:
- Inside the 404.php file, you’ll see some PHP code. Look for the closing curly brace
}at the end of the file. - Directly above this closing brace, add the following PHP code:
php
<?php header("Location: /page-not-found"); exit; ?> - Replace
/page-not-foundwith the actual slug you noted in step 2.
- Inside the 404.php file, you’ll see some PHP code. Look for the closing curly brace
- Update the File:
- Click on the Update File button to save your changes.
- Testing:
- Now, whenever a visitor encounters a 404 error on your website, they will be redirected to the custom 404 page you created with Elementor Free.
-
-
- This method involves editing theme files directly, which can be overwritten when you update your theme. You’ll need to reapply this change after each theme update.
- Ensure that the slug (
/page-not-foundin this example) matches exactly with the slug of the page you created in step 1.
-